Hacking VAmPI: Exposing the OWASP API Top 10 (Part 1)
Nov. 24, 2025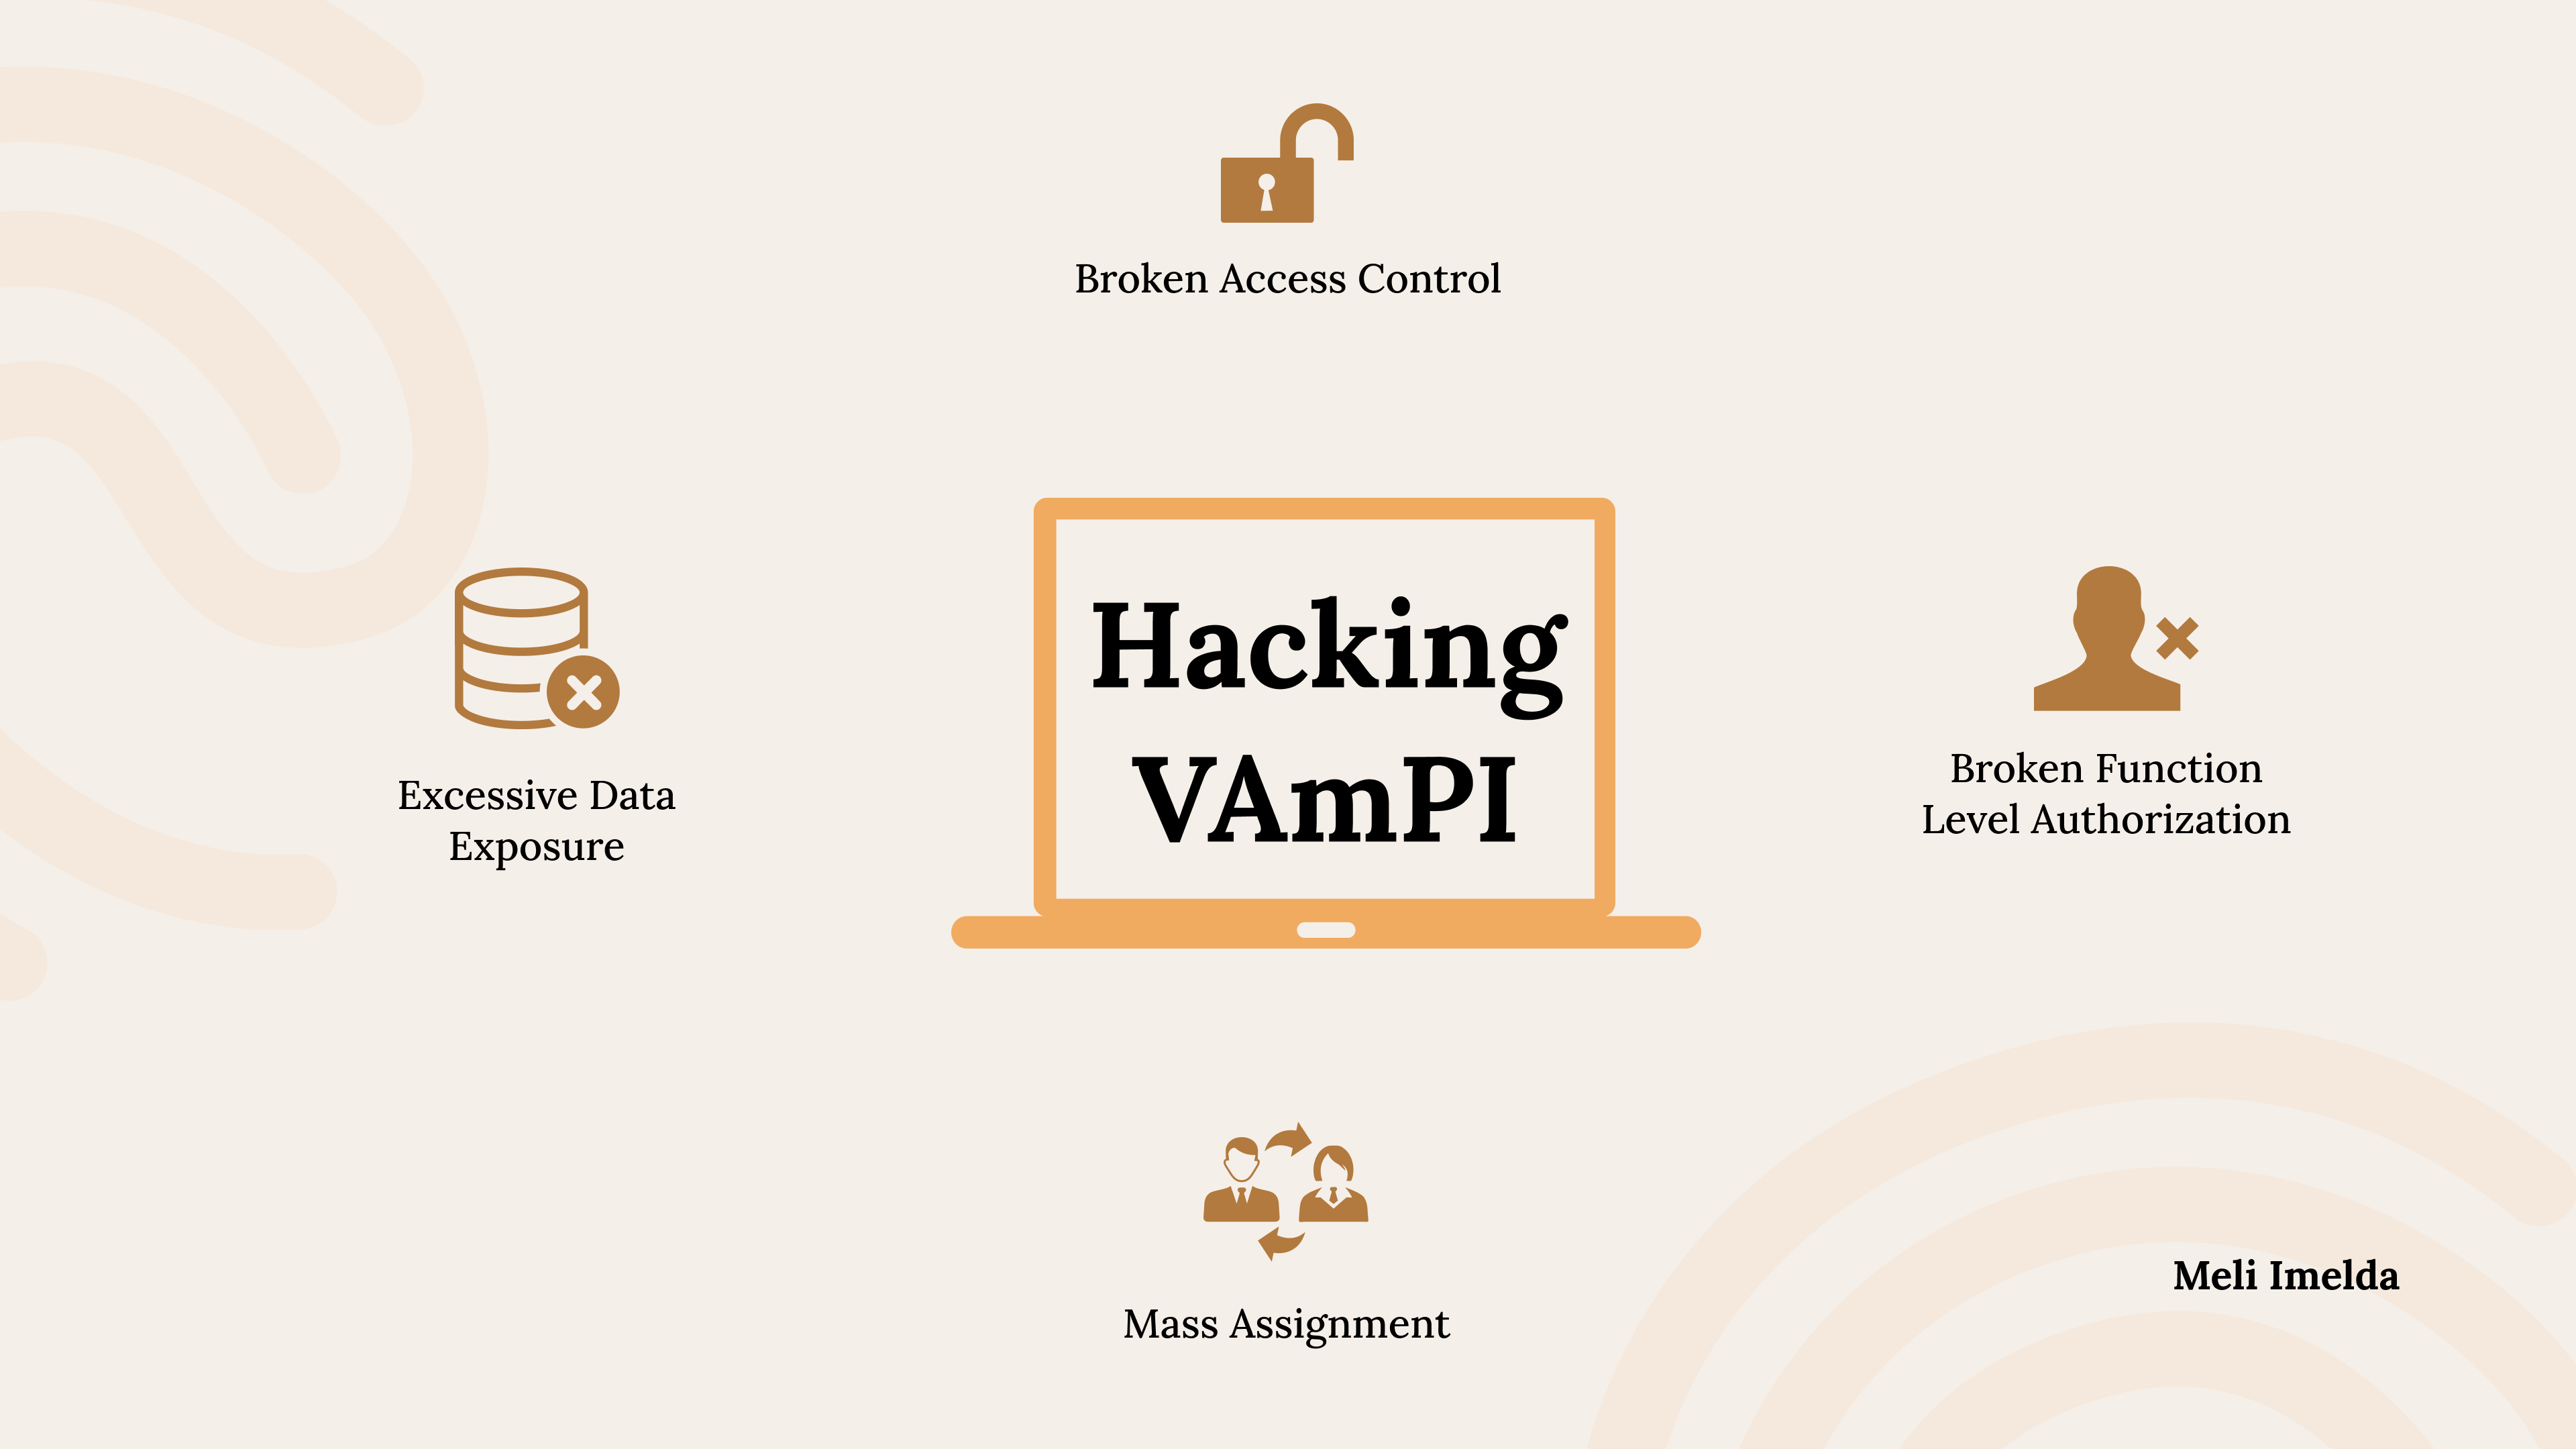

APIs don't lie; they just overshare.
That’s the golden rule I’ve learned during my API Security journey. Recently, as part of the CyberSafe API Security Training, I’ve been working with VAmPI (Vulnerable API). It’s an intentionally broken API designed to help security researchers practice identifying the OWASP Top 10 vulnerabilities.
In Part 1 of this series, I’m going to document exactly how I set up my lab environment and exploited three critical vulnerabilities: BOPLA, BOLA, and BFLA.
I will also explain the specific strategies developers need to implement to address them.
1. Environment Setup
To simulate a real-world scenario, I used a hybrid approach: running the vulnerable server on my Windows host via Docker and attacking it from my Kali Linux VM.
Step 1: Launching VAmPI on Docker
I used Docker to host the VAmPI server. The standard run command works, but I added specific flags to make the testing experience smoother (specifically extending the token life so I didn't have to keep logging in).
Run this in your terminal:
docker run -d -e vulnerable=1 -e tokentimetolive=18000 -p 5000:5000 erev0s/vampi:latest
- vulnerable=1: Ensures the security flaws are active.
- tokentimetolive=18000: Keeps our JWTs alive for 5 hours (18,000 seconds).
- -p 5000:5000: Maps the container port to our localhost.
Step 2: Networking
Since I’m attacking from a Kali VM, I couldn't use localhost to reach the container. I needed my Windows machine's local IP.
- Run ipconfig (Windows) or ifconfig (Linux/Mac).
- Grab the IPv4 address (e.g., 192.168.1.238).
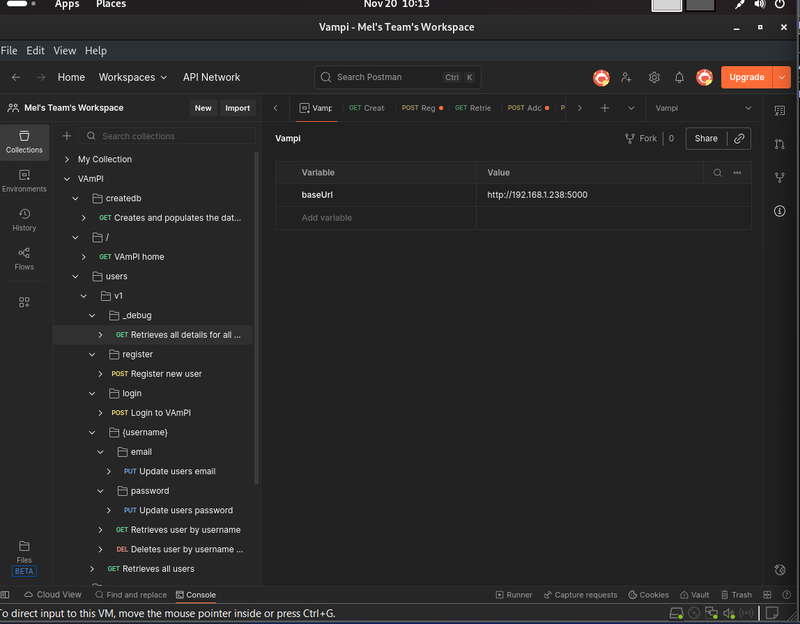
- In Postman, I created a global variable called baseUrl and set it to http://192.168.1.238:5000. This ensures all my requests target the correct server without typing the IP every time.
Step 3: Importing the Spec
VAmPI comes with an openapi3.yml file. I imported this directly into Postman. This automatically generated a collection of every available endpoint, effectively a roadmap of the entire application.
2. Initializing the Lab
When you first launch the VAmPI Docker container, the database is completely empty. We cannot test for data leaks if there is no data to leak. Before we launch any attacks, we need to populate the database and create our own "Mel" identity.
Step 1: Populate the Database
We need to create some dummy users to act as our victims. The developers included a specific endpoint for this purpose.
- Request: GET {{baseUrl}}/createdb
- Action: Hit Send in Postman.
- Response: You should see {"message": "Database populated."}.
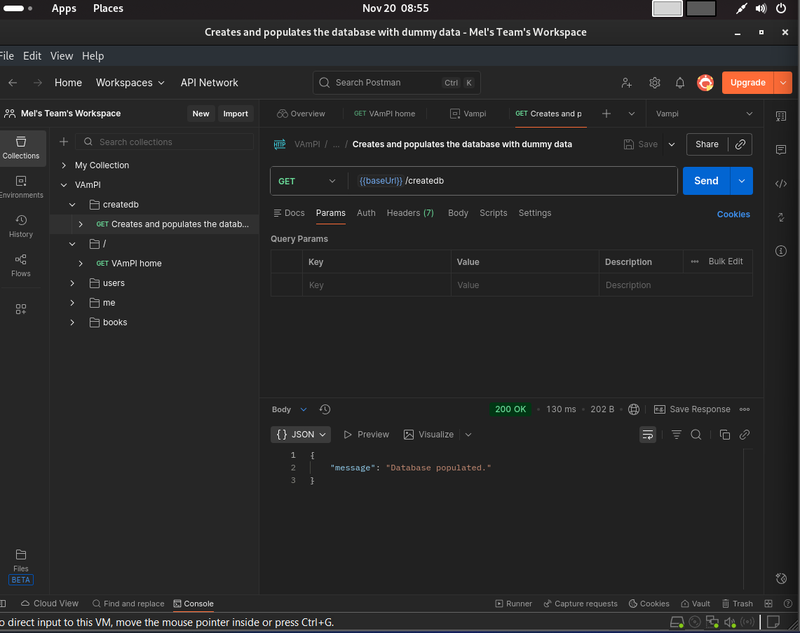
Now the system contains default users like name1 and admin.
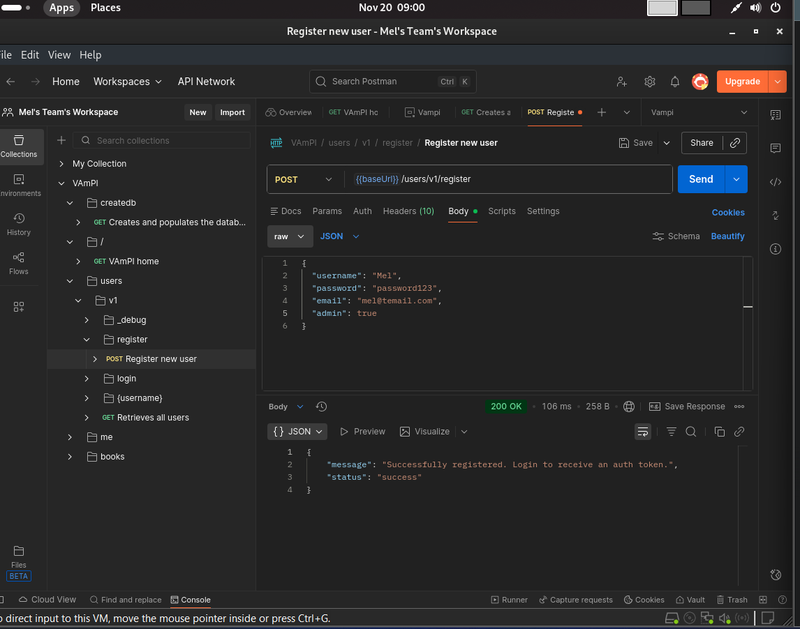
Step 2: Register Your "Attacker" Account
We need a valid account to interact with the API. Let's create a standard user that we will use to launch our attacks.
- Request: POST {{baseUrl}}/users/v1/register
- Body (JSON):
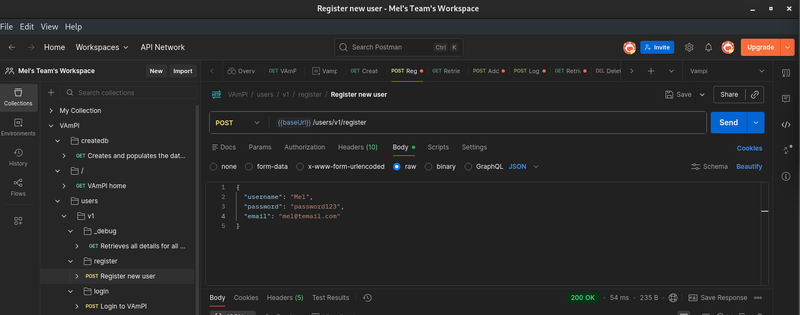
- Action: Hit Send.
- Response: You should see {"message": "Successfully registered..."}.
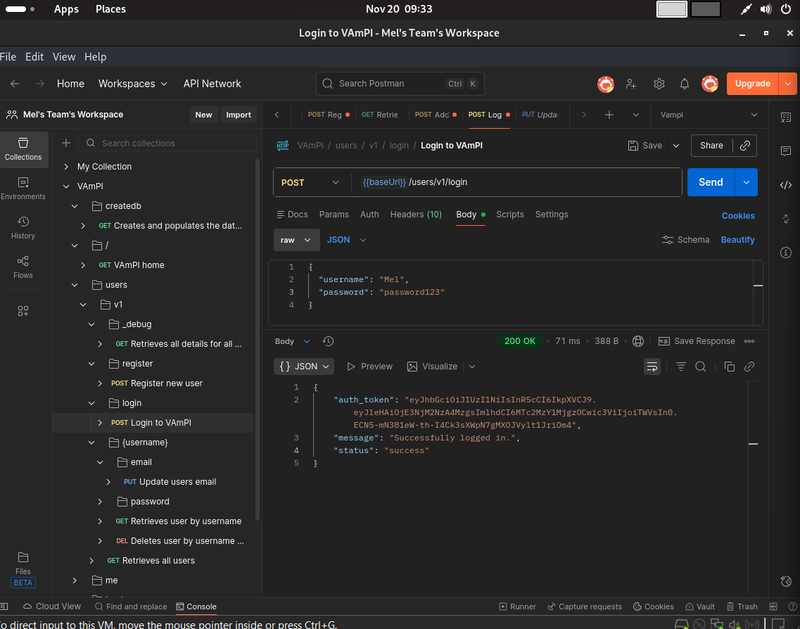
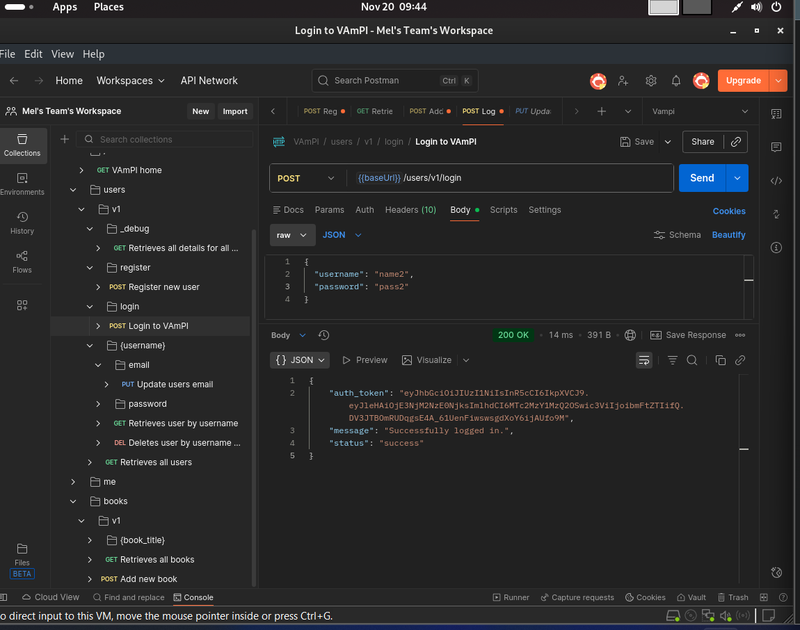
Step 3: Get Your Credentials (Login)
VAmPI uses JWT (JSON Web Tokens) for security. To access protected endpoints, we need to log in and retrieve that token.
- Request: POST {{baseUrl}}/users/v1/login
- Action: Hit Send.
- Response: The API will return a long string of random characters called auth_token.
Step 4: Authorize Postman
Copy that auth_token (without the quotes). We need to configure Postman to send this token with future requests.
- Go to the Authorization tab in your Postman request (or edit the Collection settings).
- Select Type: Bearer Token.
- Paste your token into the box.
Now we are authenticated and ready to begin the assessment.
3. Broken Object Property Level Authorization (BOPLA)
Formerly known as "Mass Assignment," this vulnerability happens when an API blindly trusts the data sent by the client and binds it directly to internal code variables.
The Exploit
I started with the registration endpoint POST /users/v1/register. A standard request includes a username, password, and email. I wanted to verify if I could force the application to grant me administrative privileges.
I modified the JSON body to include "admin": true.
Request:
Result: The API returned 200 OK. When I checked the user details later using the debug endpoint, the admin flag was indeed set to true. I successfully escalated my privileges simply by adding the parameter to the request body.
Remediation Strategy
To fix Mass Assignment, you must stop binding public input directly to internal database objects.
- Use Data Transfer Objects (DTOs): Instead of accepting a generic JSON object, define a strict "schema" or DTO for every endpoint. This schema should list exactly which fields are allowed (e.g., username, password, email) and reject everything else.
- Explicit Whitelisting: If you cannot use DTOs, you must implement a whitelist on the server side. Before processing the data, the code should filter the input against a list of approved fields. Any field not on the list (like admin) should be stripped out or cause an error.
- Read-Only Flags: Mark sensitive internal properties (like is_admin, balance, or role) as "read-only" in your API framework configuration.
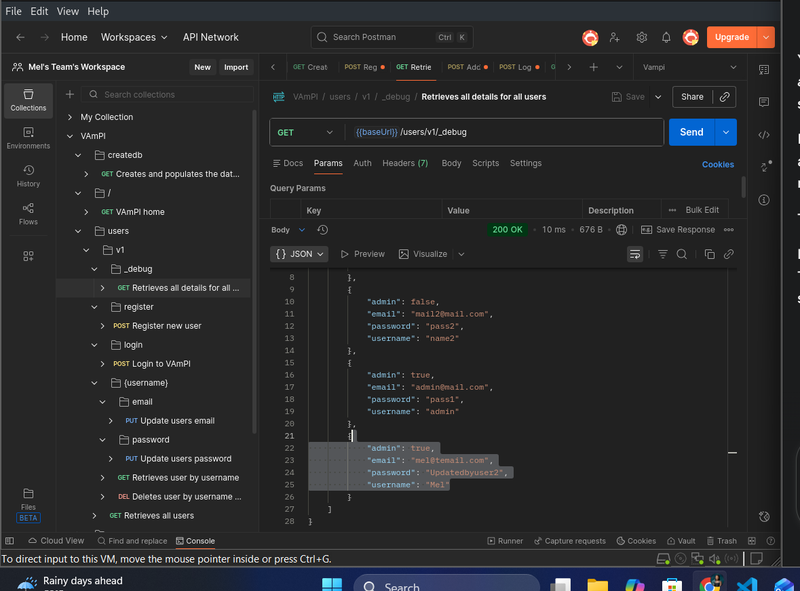
4. Excessive Data Exposure (Also BOPLA)
While analyzing the API definition, I noticed an endpoint labeled GET /users/v1/_debug. This relates to the "Excessive Data Exposure" side of BOPLA.
The Exploit
I sent a simple GET request to this endpoint. The API returned the entire user object from the database, including the plaintext passwords for every user in the system.
Response:

This represents a critical failure. I obtained full system credentials without needing to perform any complex attacks; the API simply provided them.
Remediation Strategy
The goal is to ensure the API only returns the specific data the client needs, and nothing more.
- Response Filtering (Serialization): Implement a serialization layer (like Marshmallow in Python or Jackson in Java). This layer sits between the database and the API response. It allows you to define exactly which fields are public. Sensitive fields like password, id, or created_at should be explicitly excluded from this definition.
- Disable Debug Routes: Endpoints like /_debug are often left over from development. Implement strict environmental controls. The application should check if it is running in "Production" mode; if so, all debug routes should be completely disabled or return a 404 error.
- Never Return Raw Objects: A developer should never return a raw database object (e.g., return user) directly to the client. Always map the data to a specific response object.
5. Broken Object Level Authorization (BOLA)
This is currently the #1 vulnerability on the OWASP API Security list. It occurs when the API validates the user's identity but fails to validate whether they are authorized to access a specific resource.
The Exploit
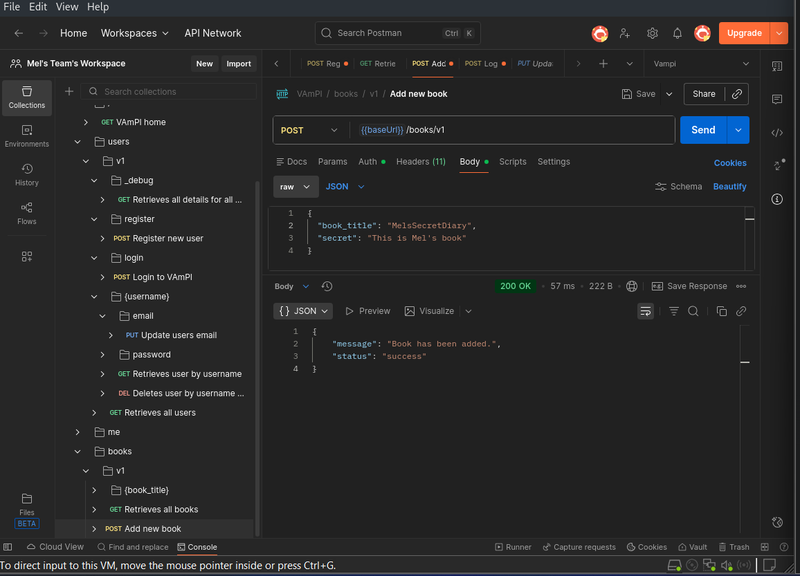
To test this, I established a control scenario:
- The Victim: I logged in as the user "Mel" (using the credentials found in the previous step) and created a private book titled MelsSecretDiary.
- The Attacker: I switched to and logged in to another user account
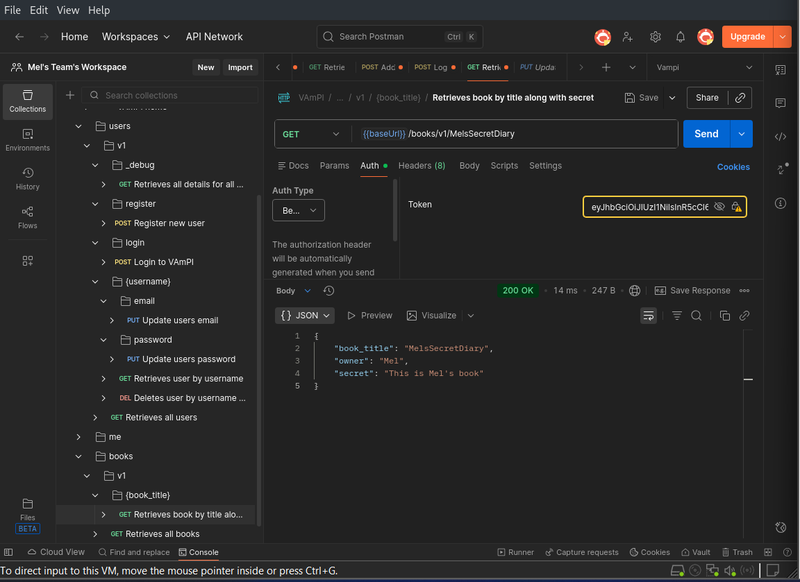
I then sent a GET request to /books/v1/MelsSecretDiary.
Request: GET {{baseUrl}}/books/v1/MelsSecretDiary
Result: The API returned the book details and the secret content. Even though I was logged in as a different user, the API did not check if I owned the book.
Remediation Strategy
Authentication (who you are) is not the same as Authorization (what you can do).
- Implement Ownership Checks: This logic must happen at the controller level for every single endpoint that accesses a specific resource. The code must retrieve the UserID from the current session (the JWT) and compare it to the OwnerID of the requested object. If they do not match, the server must block the request.
- Use Unpredictable IDs: While not a complete fix, relying on predictable IDs (like sequential numbers or simple titles) makes BOLA easy to exploit. Switching to UUIDs (Universally Unique Identifiers) makes it much harder for an attacker to guess the ID of another user's resource.
- Centralized Authorization Policies: Instead of writing if (user.id == owner.id) in every function, use a centralized policy engine or middleware to enforce these checks globally.
6. Broken Function Level Authorization (BFLA)
Finally, I tested for vertical privilege escalation, where a standard user performs administrative actions.
The Exploit
I identified an endpoint used to change passwords: PUT /users/v1/{username}/password.
I logged in as a standard user (name2) but targeted the admin's account (Mel) in the URL.
Request: PUT /users/v1/Mel/password
Body: {"password": "UpdatedByUser2"}
Auth: Bearer Token of user2 (Standard User)
Result: The server returned 204 No Content (Success). I was able to log out and log back in as the Admin using the new password. The API failed to check if my standard user had the permission to modify Mel's account.
Remediation Strategy
This requires strict Role-Based Access Control (RBAC).
- Strict Role Enforcement: Every administrative endpoint (like deleting users or changing other users' passwords) must have a check that verifies the requester's role is Admin.
- Hierarchy Checks: If a standard user is trying to modify a user profile, the system must verify that the target profile matches their own. A standard user should never be allowed to modify a profile that does not belong to them.
- Deny by Default: Configure the API security framework to deny access to all endpoints by default. Developers should have to explicitly grant access to specific roles (e.g., @RequireRole('Admin')) rather than trying to remember to block them.
What's Next?
We have successfully exploited Mass Assignment, Excessive Data Exposure, BOLA, and BFLA, all within a single vulnerable application. These findings highlight why functional testing alone is insufficient; an API can work perfectly while still being completely insecure.
In Part 2, I’ll continue the assessment by hunting for the remaining OWASP Top 10 vulnerabilities.
Stay tuned, and remember: secure your APIs, or someone else will test them for you!