My Lab Setup for API Security Testing: Docker, Postman, and Burp Suite
Dec. 10, 2025

Building a safe, reliable testing environment is the first step in any security assessment. You cannot effectively test for vulnerabilities if you are fighting your own tools.
In this article, I will walk you through the exact architecture I used to test the Vulnerable Bank API. I’ll explain why I chose Docker for deployment, how Postman helped me map the attack surface, and how Burp Suite acted as the interceptor for my exploits.
1. Docker
When testing a vulnerable application, you never want to run it directly on your main operating system. You need isolation.
What is Docker?
Docker is a platform that uses "containers" to package an application with all its dependencies (code, runtime, system tools, libraries). Unlike a full Virtual Machine (VM) that requires its own operating system, containers are lightweight and share the host's kernel but remain isolated from one another.
Why I Used It
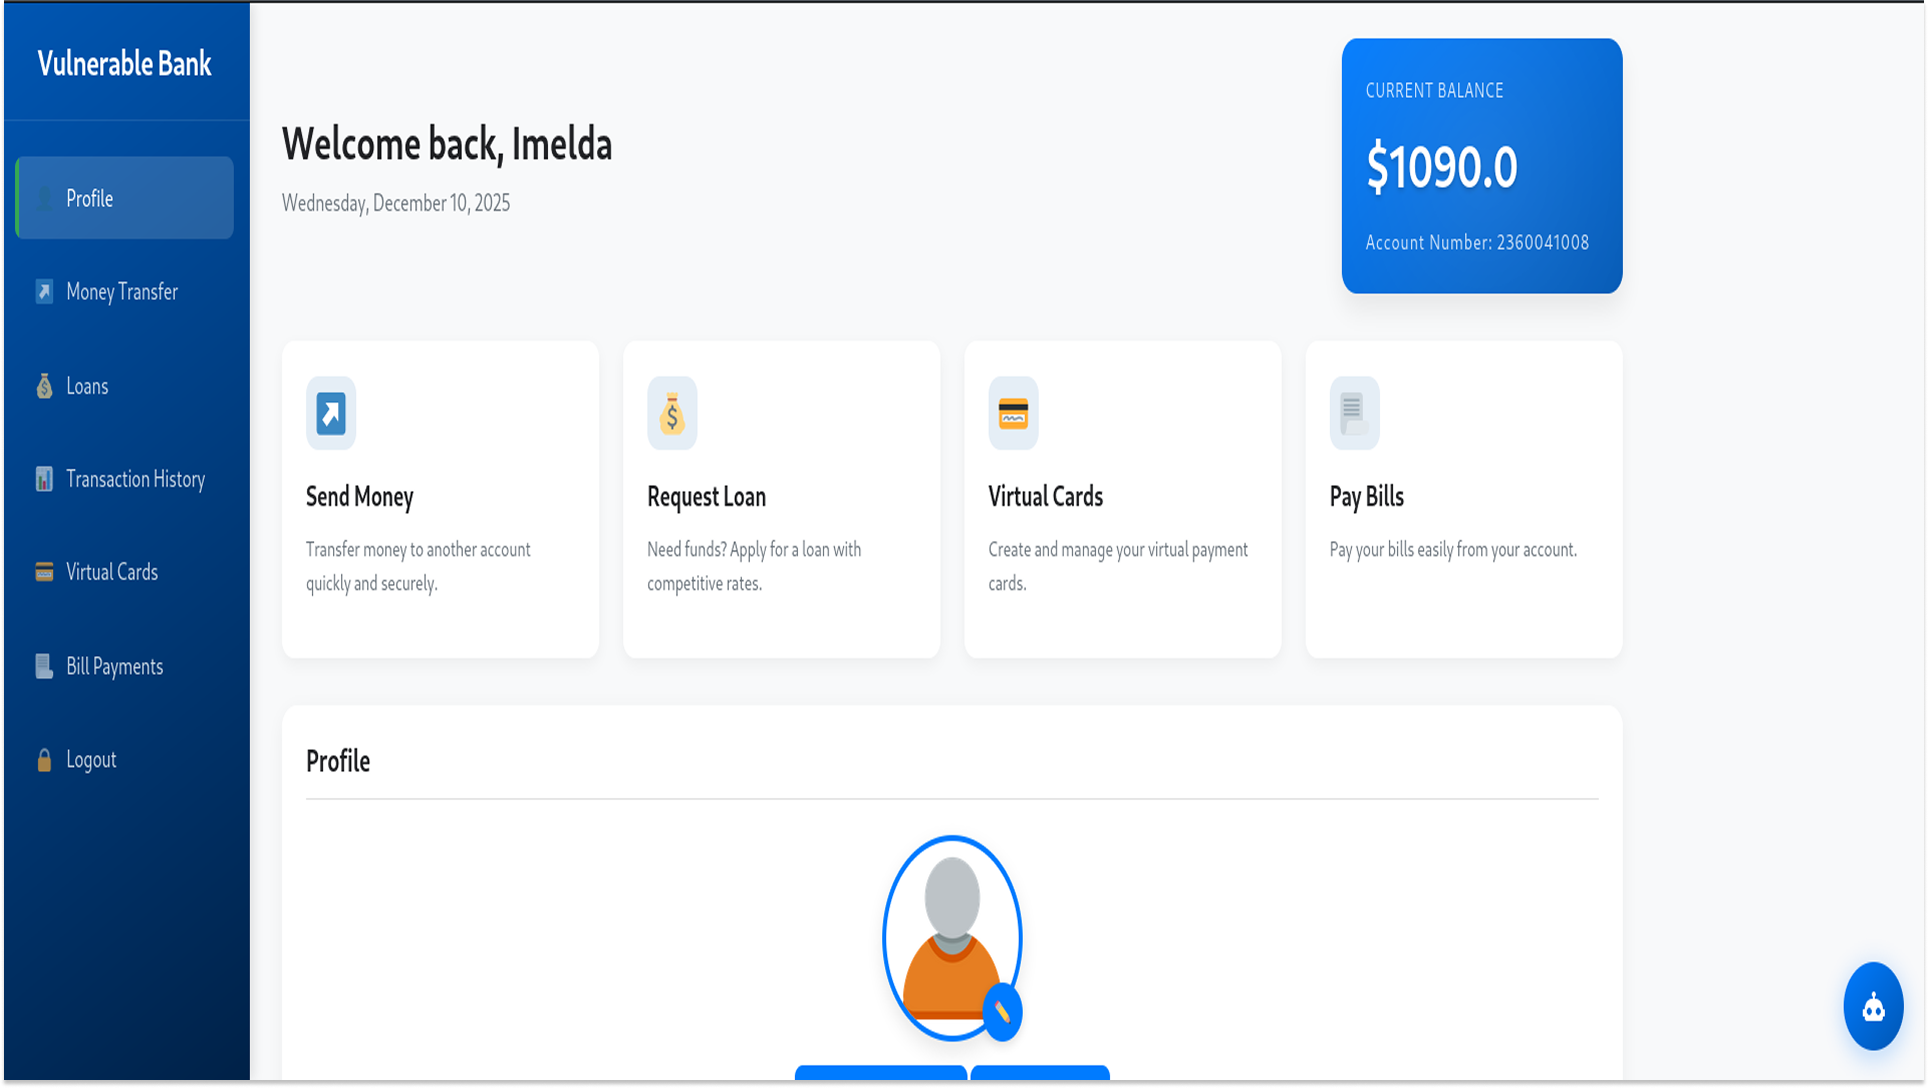
For the Vulnerable Bank API, Docker allowed me to have the entire banking infrastructure (frontend, backend API, and database) with a single command. It ensured that the vulnerabilities were consistent every time I restarted the lab.
My Setup Steps
- Installation: I installed Docker Desktop on my Windows host machine.
- Deployment: I cloned the Vulnerable Bank repository and ran the Docker Compose command. This instantly pulled the necessary images and started the services on my local network (exposed on port 5000).
            git clone https://github.com/Commando-X/vuln-bank.git
cd vuln-bank

docker-compose up --build

3. Networking: To attack this from my Kali Linux VM, I bridged the network so my attack box could communicate with the Docker container running on the Windows host.
2. Postman
Once the bank was running, I needed a way to interact with it. While a web browser is fine for clicking buttons, API testing requires precise control over the HTTP requests. This is what Postman is for.
What is Postman?
Postman is an API Client that allows developers (and testers) to build, share, and test API requests. For a penetration tester, it acts as the "map" of the application, showing every available endpoint we can try to exploit.
How I Used It
- Importing the API Schema: The Vulnerable Bank repository included a Swagger/OpenAPI documentation file (usually a .json or .yaml file). I imported this file directly into Postman.
- Mapping the Attack Surface: Instantly, Postman populated a collection of every endpoint available in the bank, including /login, /register, and the critical /api/virtual-cards.
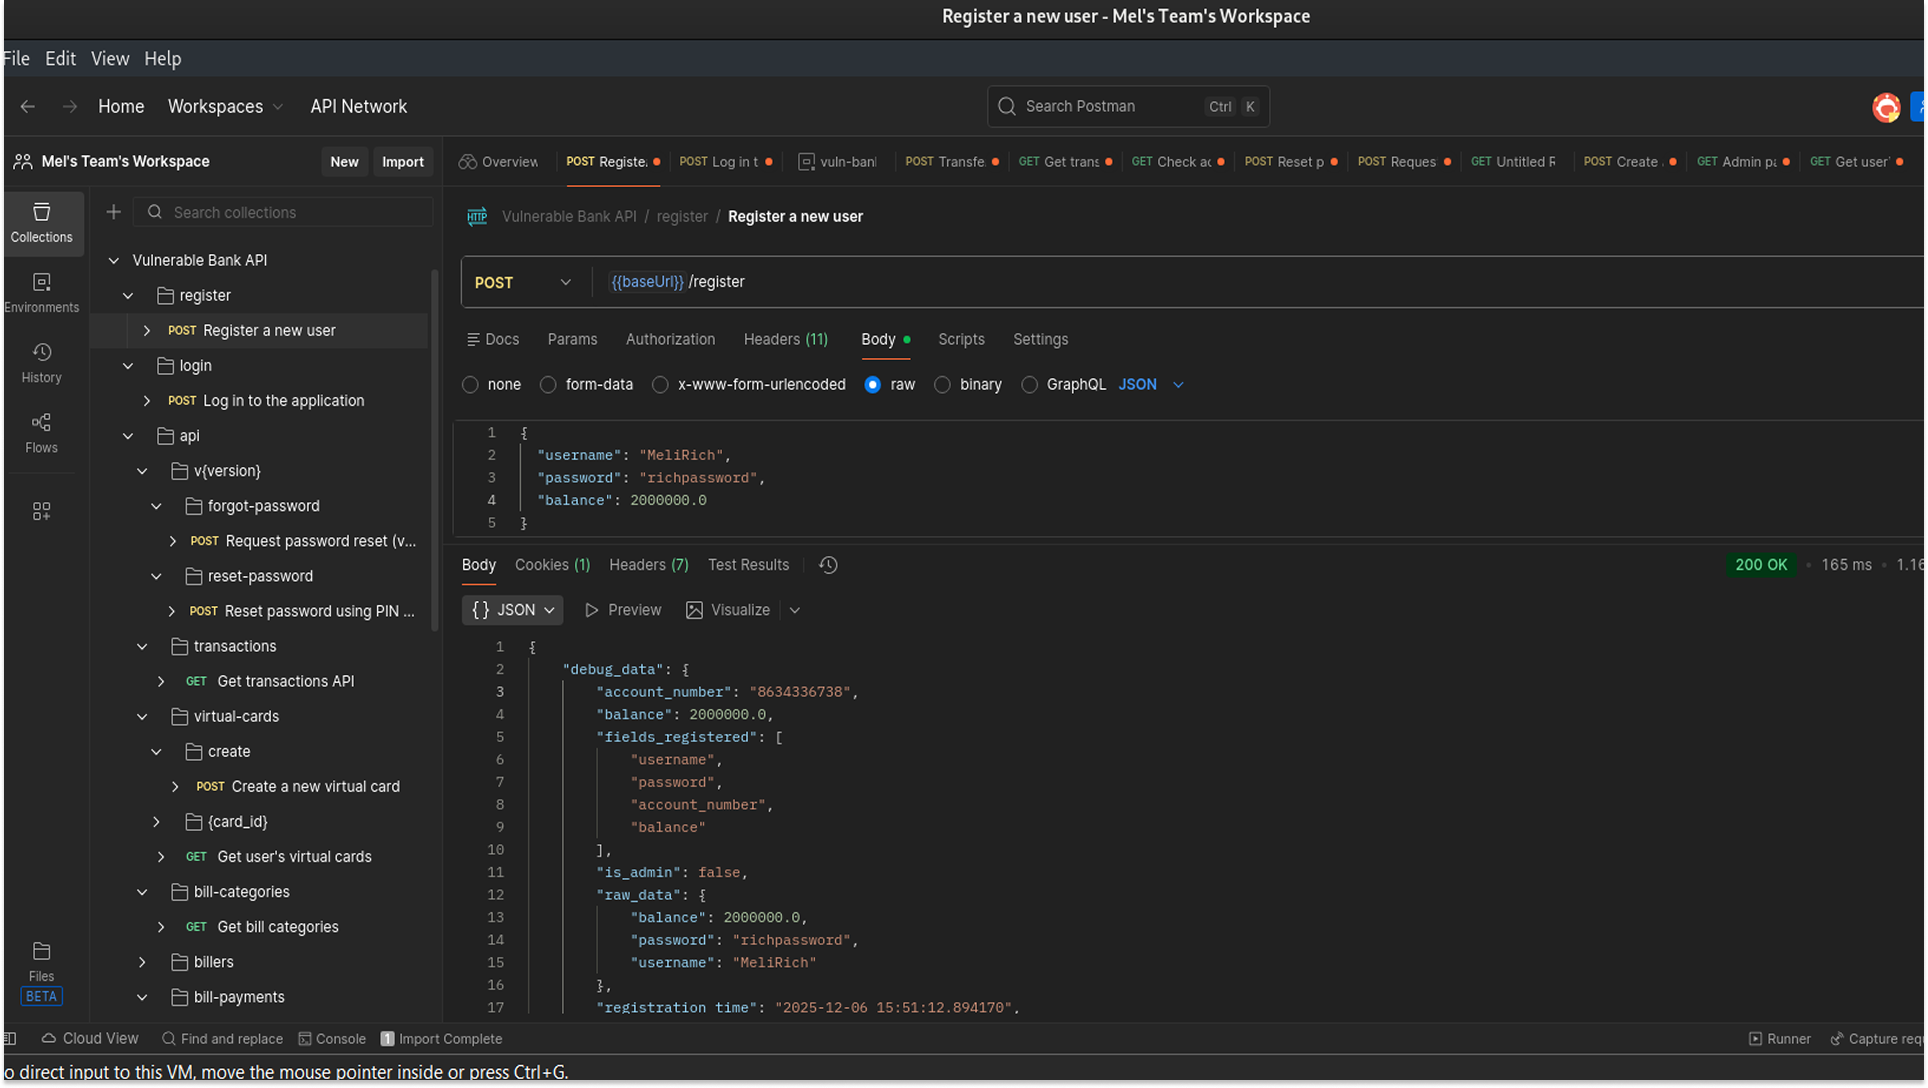
3. Global Variables: I configured a global variable {{baseUrl}} pointing to my Docker container (localhost:5000). This allowed me to switch environments easily without rewriting every single request URL.
3. Burp Suite
Postman is excellent for sending requests, but to find logic flaws, I needed to see exactly what was happening and manipulate data in transit.
What is Burp Suite?
Burp Suite is a web vulnerability scanner and proxy tool. It sits between the client (Postman/Browser) and the server (Docker), allowing you to intercept, inspect, and modify traffic before it reaches its destination.
The "Proxy" Setup
To make this work, I had to chain the tools together: Me (Kali) to Postman to Burp Proxy to Vulnerable Bank (Docker)
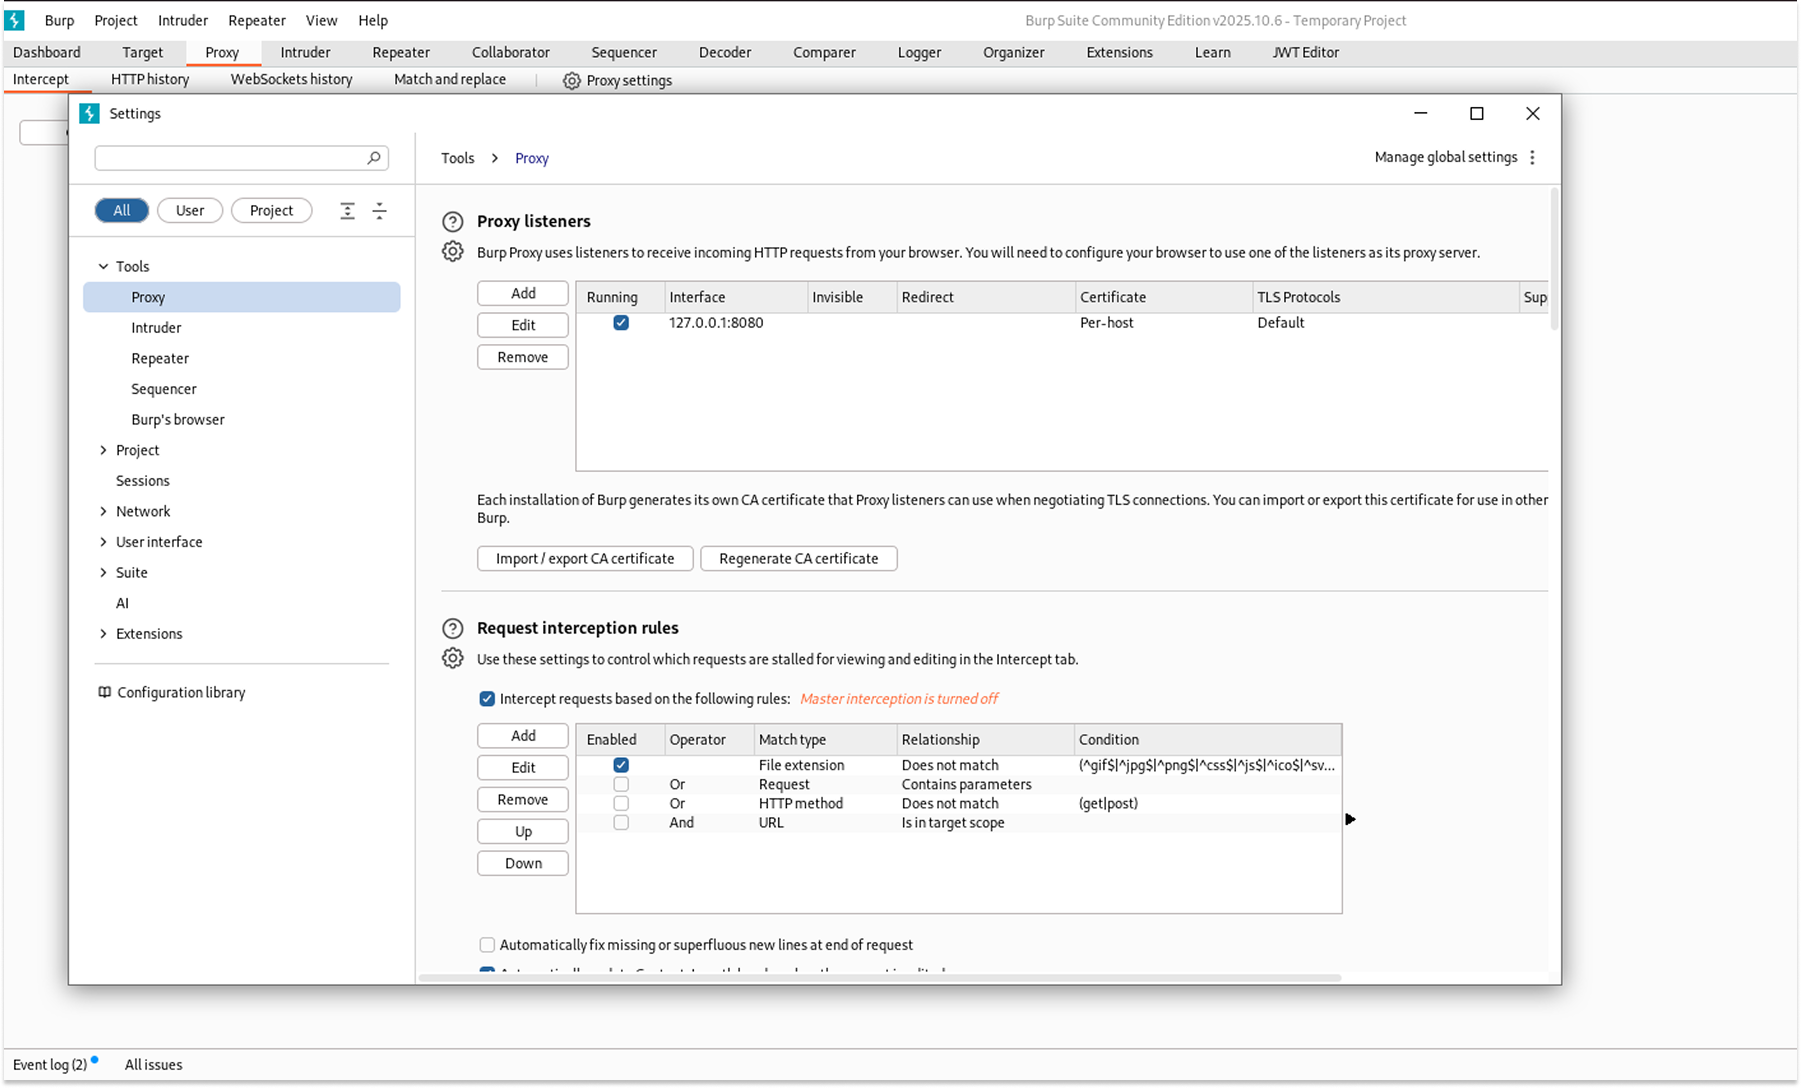
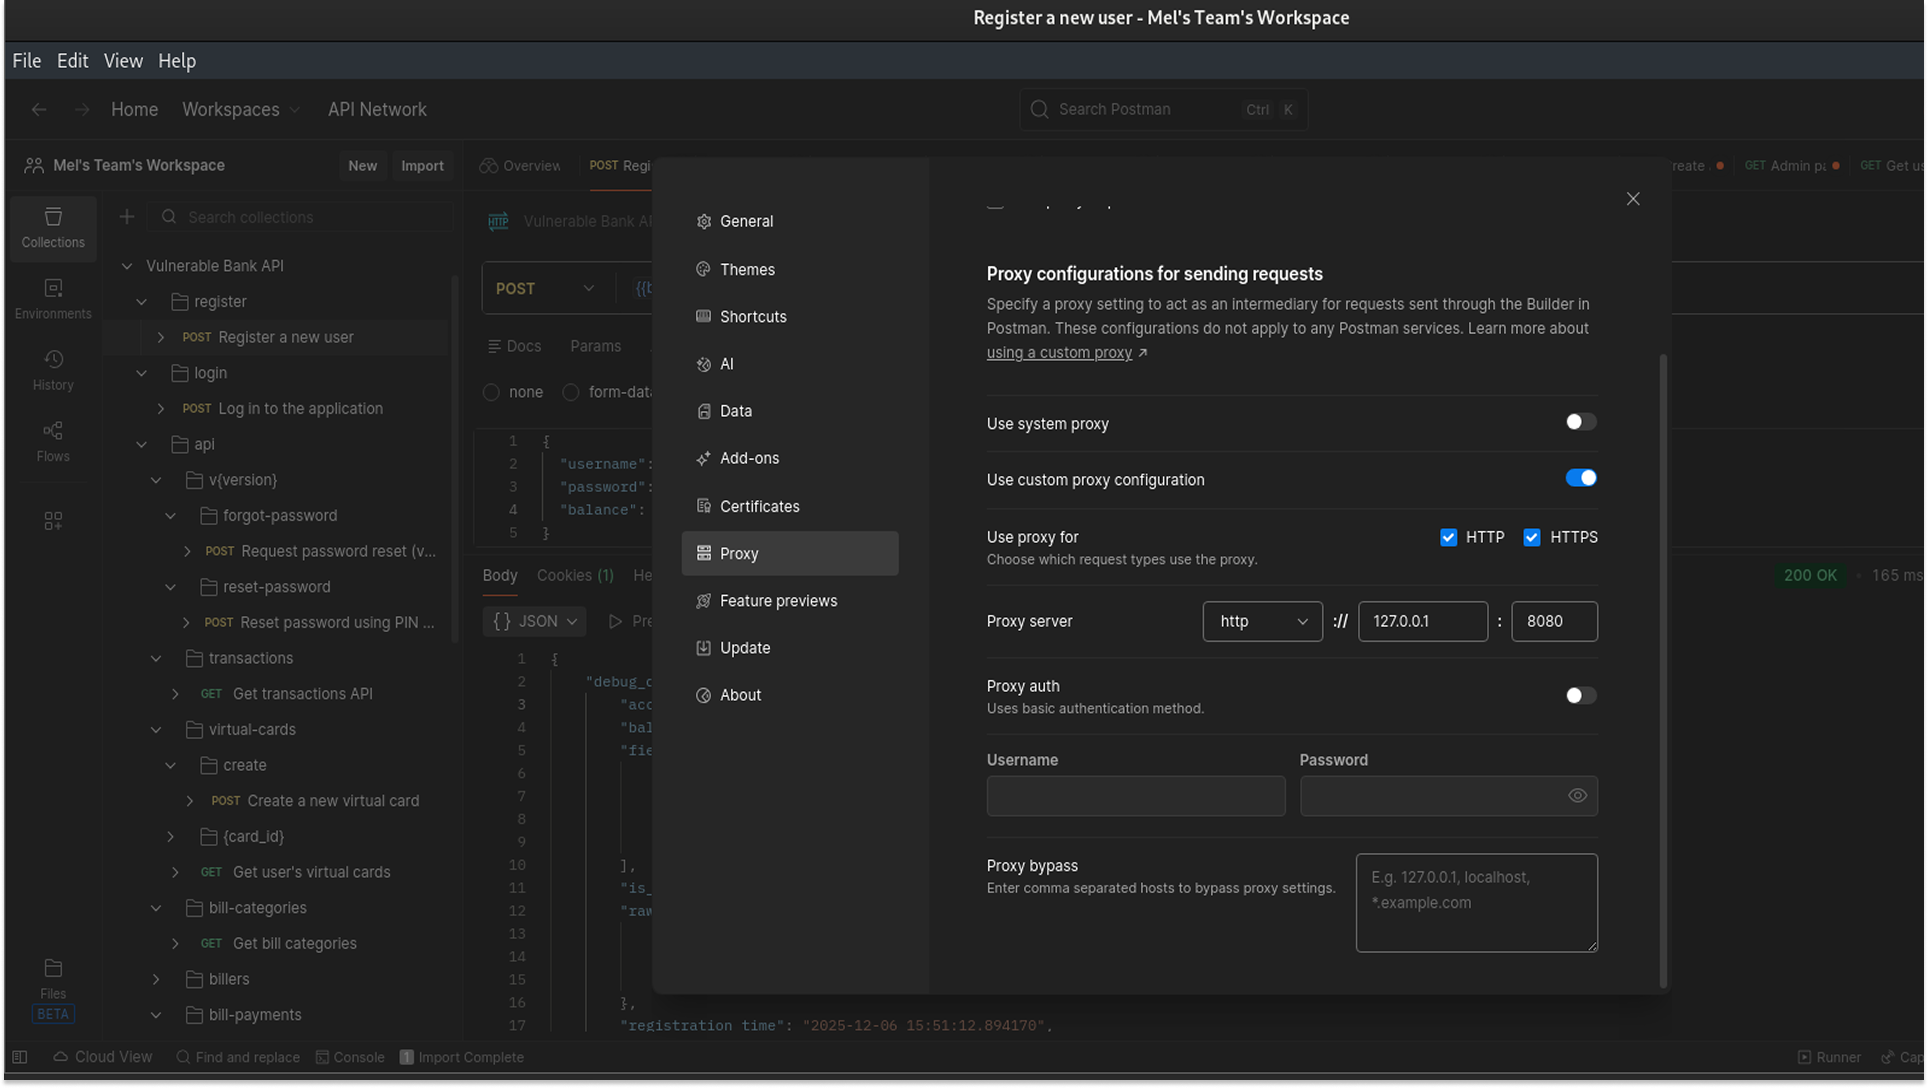
1. Configuration: I set up Burp Suite to listen on a specific port (e.g., 8080) on my Kali machine.
2. Routing Postman: I configured Postman’s proxy settings to route all traffic through 127.0.0.1:8080 (where Burp was listening).
4. Case Study: Exploiting Mass Assignment
To demonstrate that this setup works for me, here is exactly what I did to find and exploit a Mass Assignment vulnerability in the Banking App.
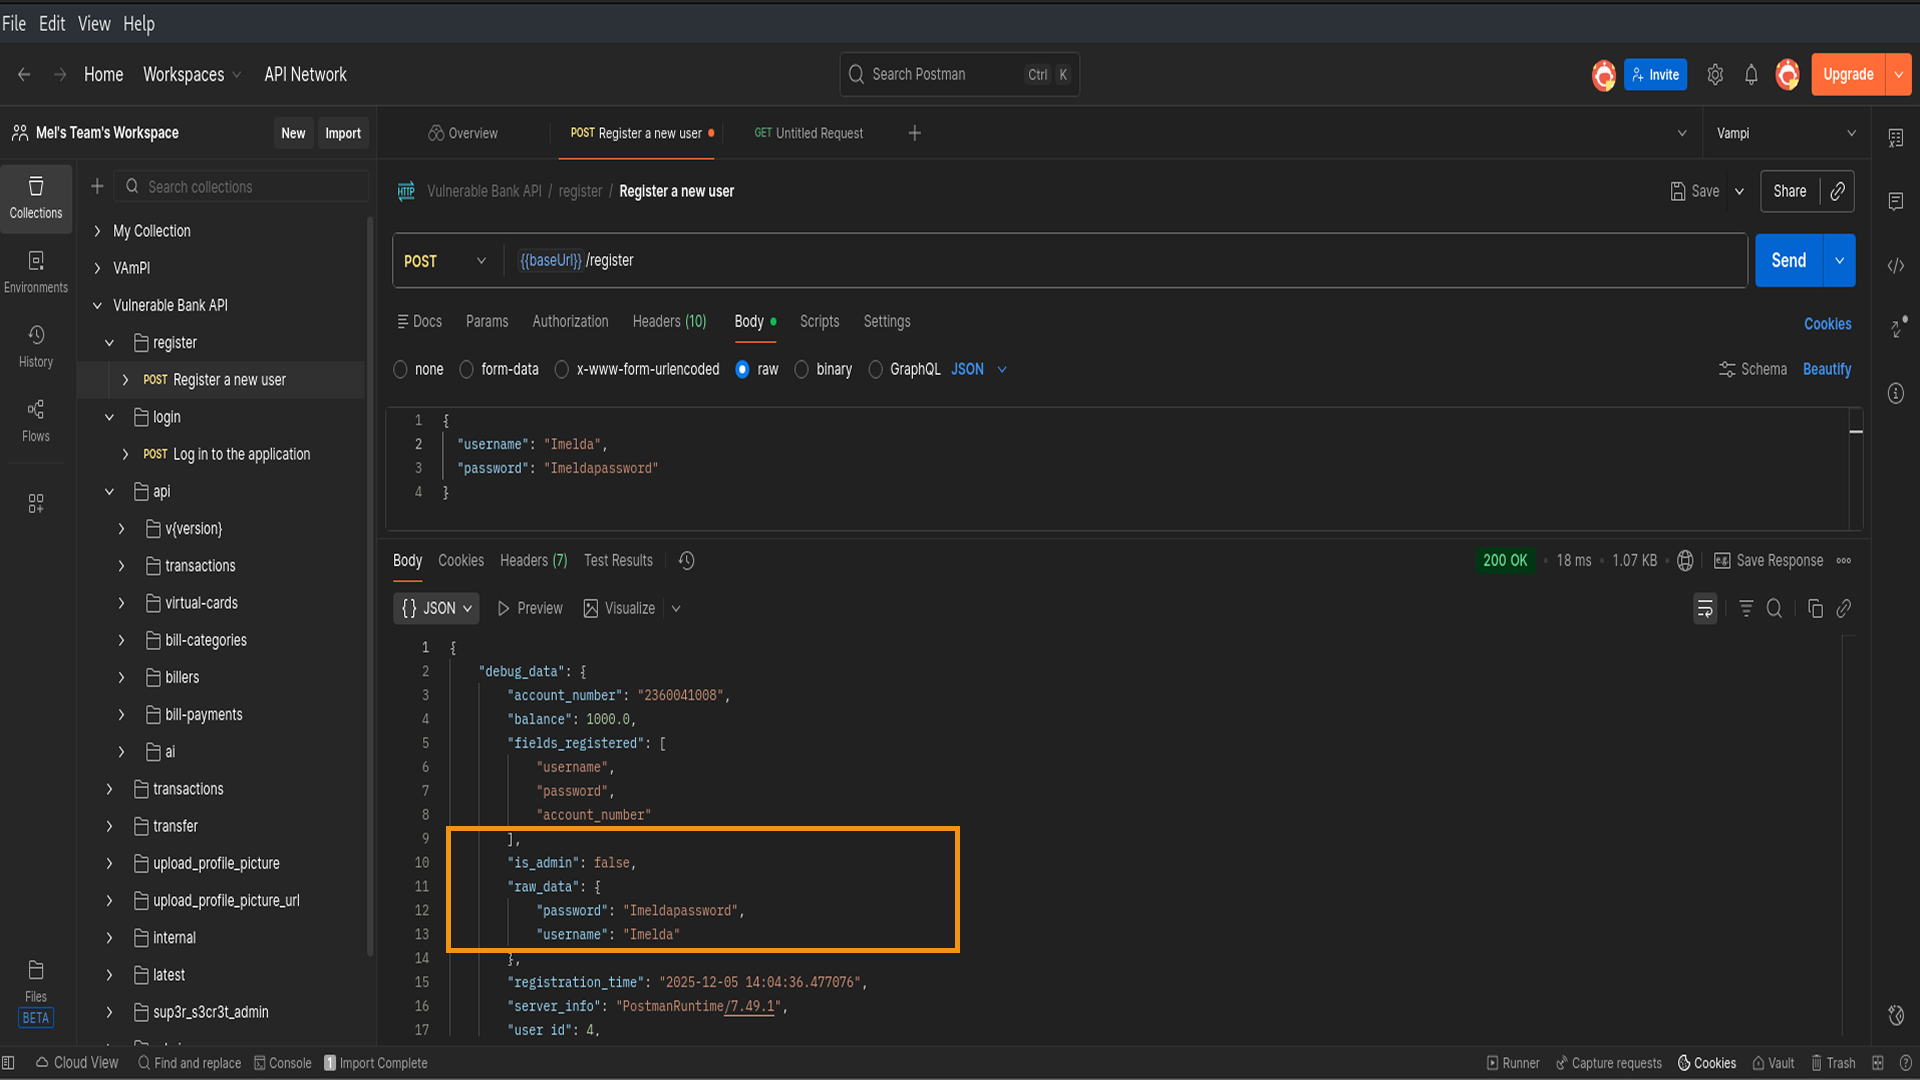
1. The Initial Discovery (Postman): I started by clicking on the POST /register endpoint in Postman. I sent a request with just the normal inputs: a username and a password, to see how the API behaves.
When I looked at the JSON response, I noticed something interesting: the server returned a user object that included fields I hadn't sent, like "is_admin": false
2. The Hypothesis: Seeing those fields sparked an idea: If the server creates these fields based on the user object, can I just manually add them myself during registration to overwrite the defaults? I decided to test this by registering a new user named TestAdmin and trying to force "is_admin": true.
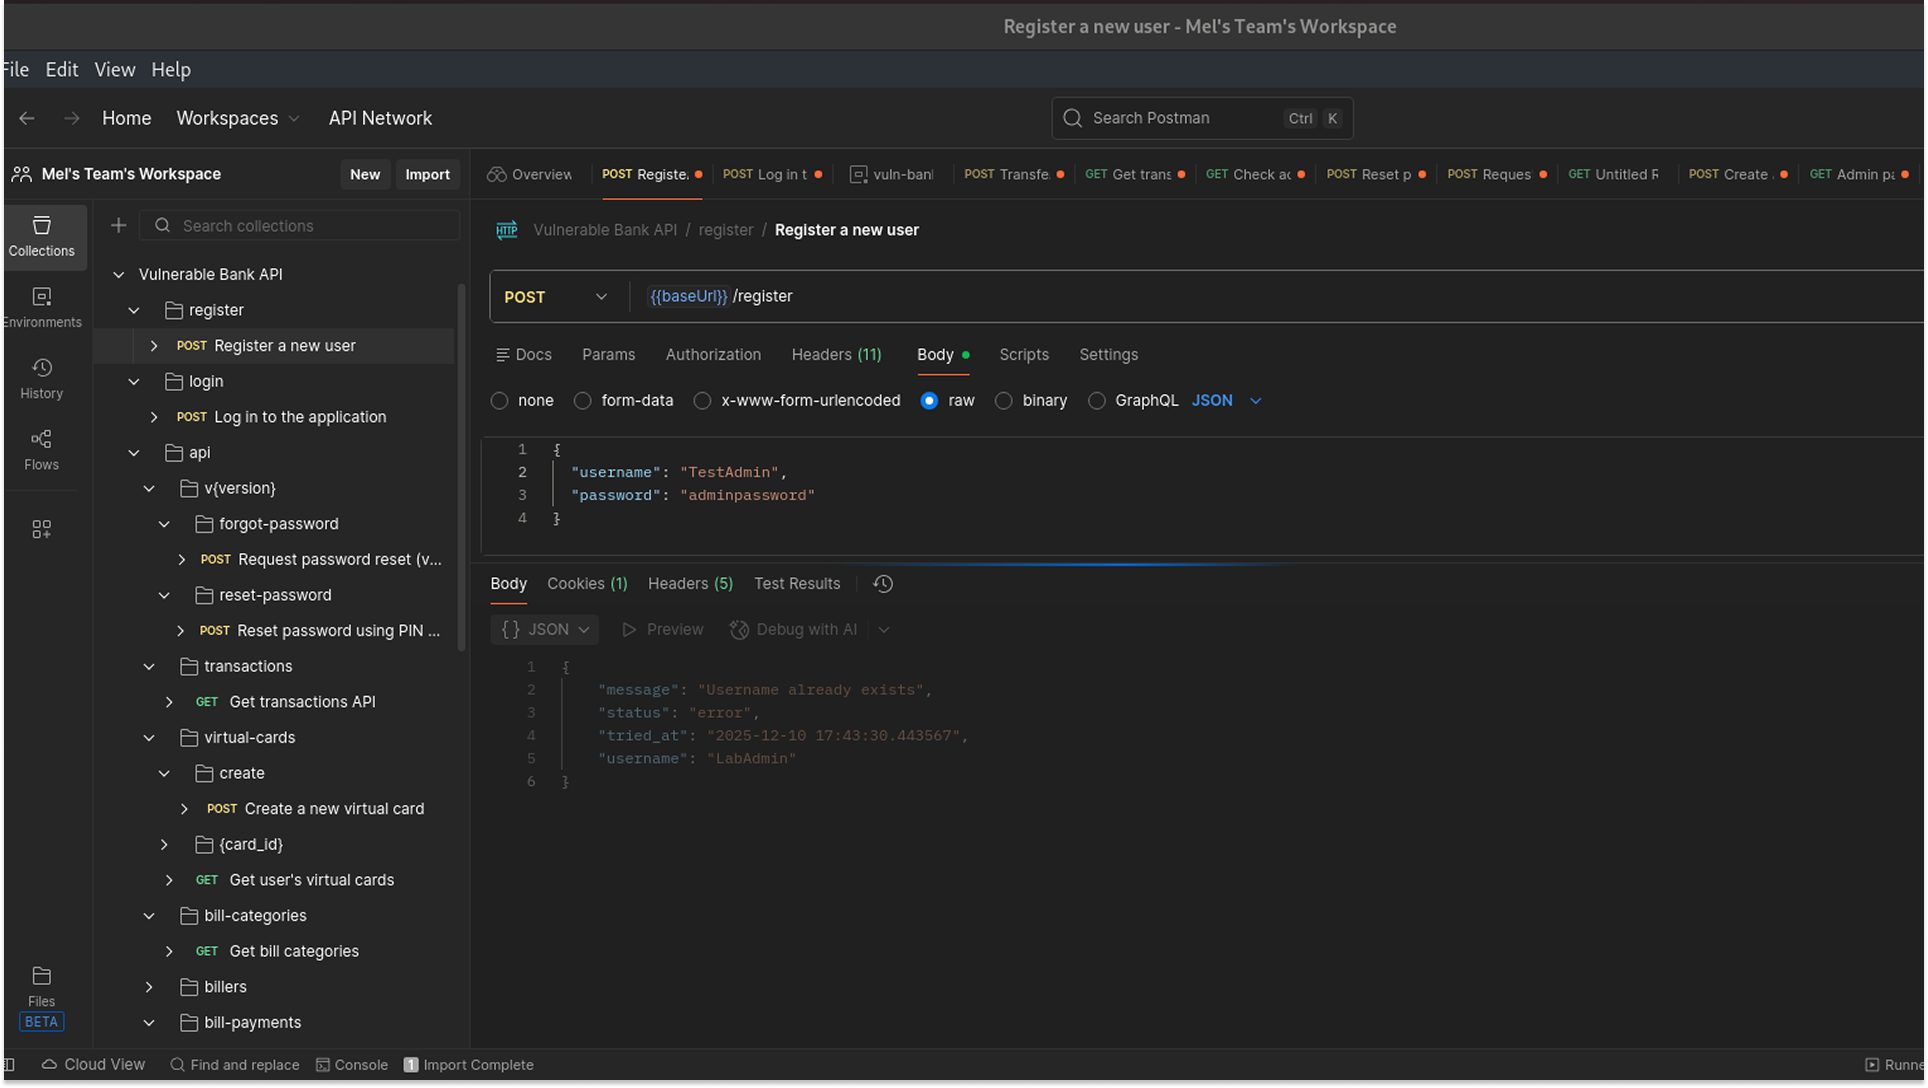
3. The Interception & Edit (Burp Suite): I set up the request for TestAdmin in Postman and clicked Send. Because my proxy was active, the request didn't go straight to the server; it was intercepted by Burp Suite.
In Burp Suite:
- I went to the Proxy > Intercept tab in Burp.
- I clicked into the raw JSON body editor.
- I added a comma after the password field and typed my new line: "is_admin": true.
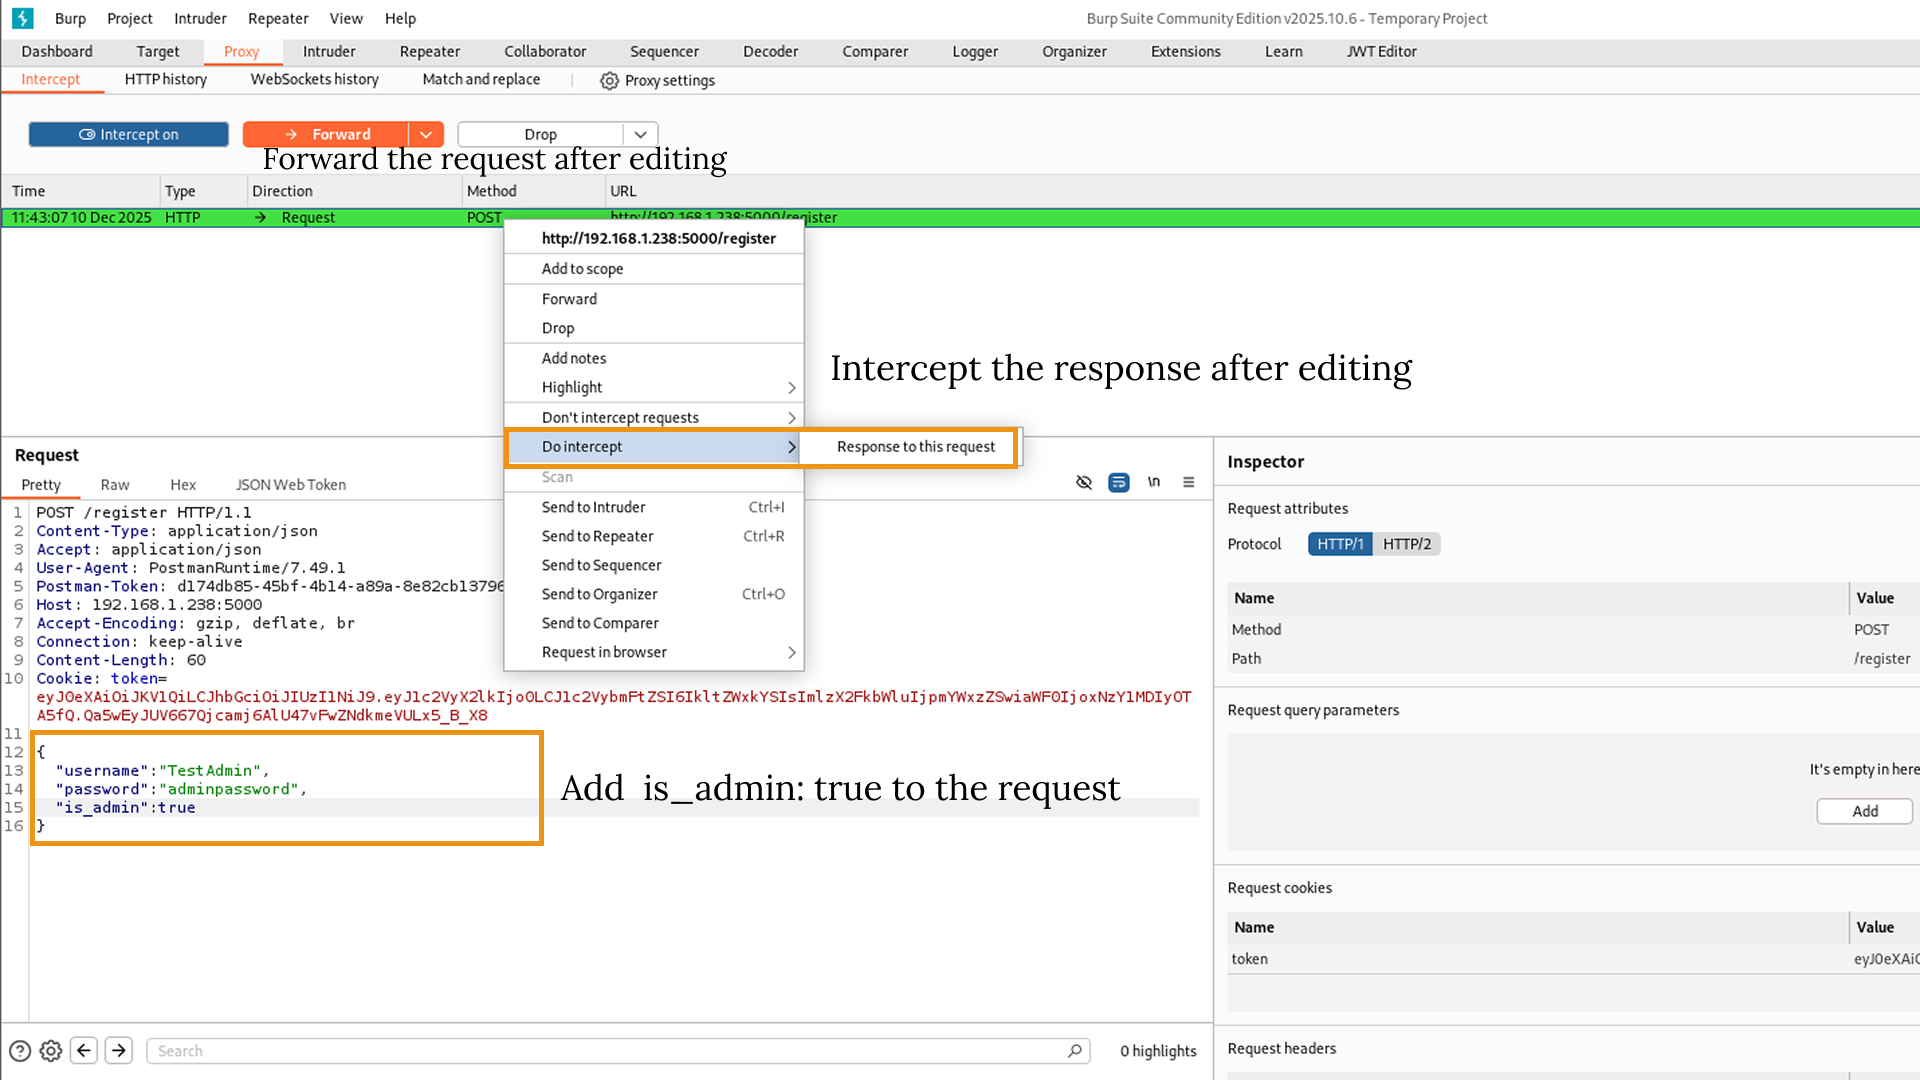
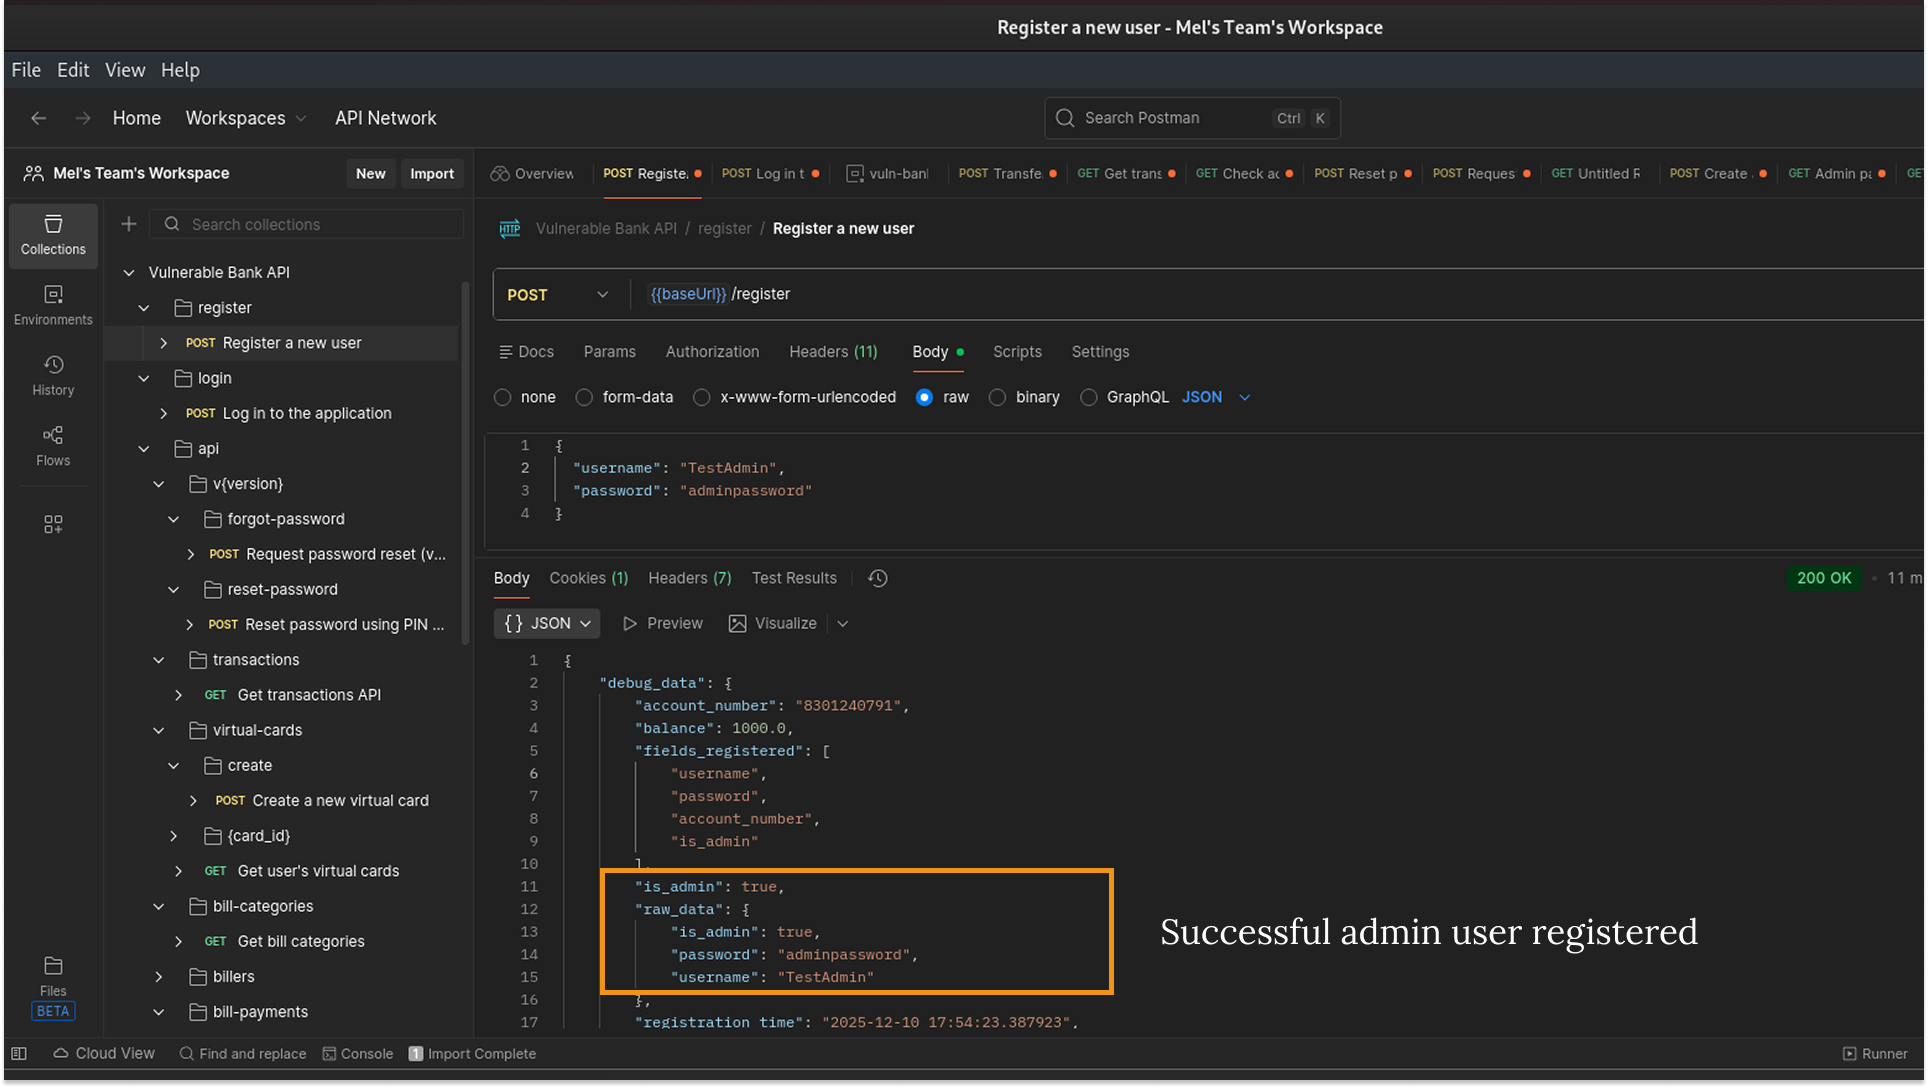
4. The Verification: I clicked Forward in Burp to send the edited request. I watched the response come back in Burp, and it showed 200 OK.
Finally, I switched back to Postman to confirm. The response body was there, clearly showing that TestAdmin had been created with Administrative privileges.
This combination of Docker for hosting, Postman for mapping, and Burp Suite for interception has become my usual setup for almost all my API security testing.
Now, let's continue to test for API vulnerabilities in the upcoming articles.